HOW CAN WE HELP YOU
SUPPORT & DOWNLOAD
Need help with your XVIEW product?
Check out the FAQ’s and Downloads below.
DOWNLOADS
Manual Download:
PC GPS Player Download:
(Windows only, not compatible with MAC)


FAQ
- Ensure windscreen is clean and free of debris, use glass cleaner or an alcohol swab to clean.
- Ensure that the plastic film has been removed from the adhesive pad.
- When mounting hold the bracket firmly to the windscreen for at least 60 seconds.
- Vehicle Accessory Socket – Check the vehicle accessory socket has power, simply plug another device and see if it powers up (or use a test light / multimeter to check for power).
- Dash Cam Power Cable – Check the fuse in the tip of the accessory plug, it may need to be replaced.
- Dash Cam – Connect the dash cam to a computer via the USB cable to see if it powers up.
- It is normal for the dash cam to feel warm to the touch during typical use, especially when it is recording HD video.
- Format the Micro SD card before using. Be sure the Micro SD card is compatible with the device, see “Stops automatically while recording” fault.
- Check to see whether there is enough space on the Micro SD card. If not, the Micro SD card will need to be formatted.
- Check to see if there are any finger prints or dirt present on the camera lens. If needed, clean with a soft dry cloth before recording.
- Also be sure to have removed the transparent lens cover during installation.
- Reset the unit by pushing and holding the reset button for a few seconds and try again.
- Format Micro SD Card in a computer.
- This dash cam does not have a battery, it has a Super Capacitor.
- The dash cam will only turn on when the vehicle is switched on.
- This dash cam does not have a battery, it has a Super Capacitor.
- The Super Capacitor only holds enough power to safely shut down the dash cam, securely save the last file when power is disconnected and retain settings.
- The dash cam is designed to be connected to power at all times while being used.
- Make sure you have downloaded the XVIEW XV22 Dash Cam App to your smartphone.
- Ensure WiFi is switched on in your mobile settings and select your dash cam from the device list.
- Make sure you have entered the correct password for the device (12345678).
- If the device is still not connecting correctly, forget the dash cam from the phone through the settings, reset the dash cam, reset the mobile phone, and then try again.
- Check your phone has the latest software update and also check the app has been updated with the latest version.
- The video files from the dash cam are in .MOV format and may not be compatible with your PC if suitable playback software is not installed.
- Check to see whether there is enough space on the Micro SD card.
- Ensure correct Micro SD card is being used, 8-64Gb Class 10 or above Micro SDHC is recommended. Other types of Micro SD cards may not be suitable for use in dash cams.
- If the correct Micro SD Card is being used, format the Micro SD Card in a computer.
- Micro SD cards have a limited lifespan and become corrupt after a period of time. This is due to the continuous loop recording function. If this has occured, you will need to replace you Micro SD Card.
- Reset the unit by pushing and holding the reset button for a few seconds and try again.
- Format Micro SD Card in a computer.
- Should the problem persist please contact us:
EMAIL – [email protected]
If a 64GB card is not working in the dash cam, try the following steps:
- Unplug the dash cam from power
- Remove 64GB SD card whilst power is OFF
- Turn dash cam back ON without any SD card inserted
- Connect to dash cam Wi-Fi & connect with Gator app on your phone
- Insert SD card whilst dash cam is still ON and you are still connected with the app
- Format the SD card using the format options in the Gator App
- Power the dash cam OFF
- Turn dash cam back ON, it should now work correctly with the 64GB SD card installed.
For screen or non wifi models follow the same process but use the dash cam settings menu to access the format options.
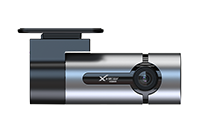
DOWNLOADS
Manual Download:
PC GPS Player Download:
(Windows only, not compatible with MAC)
FAQ
- Ensure windscreen is clean and free of debris, use glass cleaner or an alcohol swab to clean.
- Ensure that the plastic film has been removed from the adhesive pad.
- When mounting hold the bracket firmly to the windscreen for at least 60 seconds.
- Vehicle Accessory Socket – Check the vehicle accessory socket has power, simply plug another device and see if it powers up (or use a test light / multimeter to check for power).
- Dash Cam Power Cable – Check the fuse in the tip of the accessory plug, it may need to be replaced.
- Dash Cam – Connect the dash cam to a computer via the USB cable to see if it powers up.
- It is normal for the dash cam to feel warm to the touch during typical use, especially when it is recording HD video.
- Format the Micro SD card before using. Be sure the Micro SD card is compatible with the device, see “Stops automatically while recording” fault.
- Check to see whether there is enough space on the Micro SD card. If not, the Micro SD card will need to be formatted.
- Check to see if there are any finger prints or dirt present on the camera lens. If needed, clean with a soft dry cloth before recording.
- Also be sure to have removed the transparent lens cover during installation.
- Reset the unit by pushing and holding the reset button for a few seconds and try again.
- Format Micro SD Card in a computer.
- This dash cam does not have a battery, it has a Super Capacitor.
- The dash cam will only turn on when the vehicle is switched on.
- This dash cam does not have a battery, it has a Super Capacitor.
- The Super Capacitor only holds enough power to safely shut down the dash cam, securely save the last file when power is disconnected and retain settings.
- The dash cam is designed to be connected to power at all times while being used.
- Make sure you have downloaded the XVIEW XV22 Dash Cam App to your smartphone.
- Ensure WiFi is switched on in your mobile settings and select your dash cam from the device list.
- Make sure you have entered the correct password for the device (12345678).
- If the device is still not connecting correctly, forget the dash cam from the phone through the settings, reset the dash cam, reset the mobile phone, and then try again.
- Check your phone has the latest software update and also check the app has been updated with the latest version.
- The video files from the dash cam are in .MOV format and may not be compatible with your PC if suitable playback software is not installed.
- Check to see whether there is enough space on the Micro SD card.
- Ensure correct Micro SD card is being used, 8-64Gb Class 10 or above Micro SDHC is recommended. Other types of Micro SD cards may not be suitable for use in dash cams.
- If the correct Micro SD Card is being used, format the Micro SD Card in a computer.
- Micro SD cards have a limited lifespan and become corrupt after a period of time. This is due to the continuous loop recording function. If this has occured, you will need to replace you Micro SD Card.
- Reset the unit by pushing and holding the reset button for a few seconds and try again.
- Format Micro SD Card in a computer.
- Should the problem persist please contact us:
EMAIL – [email protected]
If a 64GB card is not working in the dash cam, try the following steps:
- Unplug the dash cam from power
- Remove 64GB SD card whilst power is OFF
- Turn dash cam back ON without any SD card inserted
- Connect to dash cam Wi-Fi & connect with Gator app on your phone
- Insert SD card whilst dash cam is still ON and you are still connected with the app
- Format the SD card using the format options in the Gator App
- Power the dash cam OFF
- Turn dash cam back ON, it should now work correctly with the 64GB SD card installed.
For screen or non wifi models follow the same process but use the dash cam settings menu to access the format options.
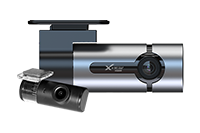
DOWNLOADS
Manual Download:
PC GPS Player Download:
(Windows only, not compatible with MAC)
Download the app here:
FAQ
- Ensure windscreen is clean and free of debris, use glass cleaner or an alcohol swab to clean.
- Ensure that the plastic film has been removed from the adhesive pad.
- When mounting hold the bracket firmly to the windscreen for at least 60 seconds.
- Vehicle Accessory Socket – Check the vehicle accessory socket has power, simply plug another device and see if it powers up (or use a test light / multimeter to check for power).
- Dash Cam Power Cable – Check the fuse in the tip of the accessory plug, it may need to be replaced.
- Dash Cam – Connect the dash cam to a computer via the USB cable to see if it powers up.
- It is normal for the dash cam to feel warm to the touch during typical use, especially when it is recording HD video.
- Format the Micro SD card before using. Be sure the Micro SD card is compatible with the device, see “Stops automatically while recording” fault.
- Check to see whether there is enough space on the Micro SD card. If not, the Micro SD card will need to be formatted.
- The video files from the dash cam are in .MP4 format and may not be compatible with your PC if suitable playback software is not installed.
- Check to see if there are any finger prints or dirt present on the camera lens. If needed, clean with a soft dry cloth before recording.
- Also be sure to have removed the transparent lens cover during installation.
- Reset the unit by pushing and holding the reset button for a few seconds and try again.
- Format Micro SD Card in a computer.
- This dash cam does not have a battery, it has a Super Capacitor.
- The dash cam will only turn on when the vehicle is switched on.
- This dash cam does not have a battery, it has a Super Capacitor.
- The Super Capacitor only holds enough power to safely shut down the dash cam, securely save the last file when power is disconnected and retain settings.
- The dash cam is designed to be connected to power at all times while being used.
- Make sure you have downloaded the XVIEW XV20 Dash Cam App to your smartphone.
- Ensure WiFi is switched on in your mobile settings and select your dash cam from the device list.
- Make sure you have entered the correct password for the device (12345678).
- If the device is still not connecting correctly, forget the dash cam from the phone through the settings, reset the dash cam, reset the mobile phone, and then try again.
- Check your phone has the latest software update and also check the app has been updated with the latest version.
- Check to see whether there is enough space on the Micro SD card.
- Ensure correct Micro SD card is being used, 8-64Gb Class 10 or above Micro SDHC is recommended. Other types of Micro SD cards may not be suitable for use in dash cams.
- If the correct Micro SD Card is being used, format the Micro SD Card in a computer.
- Micro SD cards have a limited lifespan and become corrupt after a period of time. This is due to the continuous loop recording function. If this has occured, you will need to replace you Micro SD Card.
- Reset the unit by pushing and holding the reset button for a few seconds and try again.
- Format Micro SD Card in a computer.
- Should the problem persist please contact us:
EMAIL – [email protected]
If a 64GB card is not working in the dash cam, try the following steps:
- Unplug the dash cam from power
- Remove 64GB SD card whilst power is OFF
- Turn dash cam back ON without any SD card inserted
- Connect to dash cam Wi-Fi & connect with Gator app on your phone
- Insert SD card whilst dash cam is still ON and you are still connected with the app
- Format the SD card using the format options in the Gator App
- Power the dash cam OFF
- Turn dash cam back ON, it should now work correctly with the 64GB SD card installed.
For screen or non wifi models follow the same process but use the dash cam settings menu to access the format options.
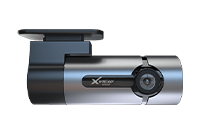
DOWNLOADS
Manual Download:
FAQ
- Ensure windscreen is clean and free of debris, use glass cleaner or an alcohol swab to clean.
- Ensure that the plastic film has been removed from the adhesive pad.
- When mounting hold the bracket firmly to the windscreen for at least 60 seconds.
- Vehicle Accessory Socket – Check the vehicle accessory socket has power, simply plug another device and see if it powers up (or use a test light / multimeter to check for power).
- Dash Cam Power Cable – Check the fuse in the tip of the accessory plug, it may need to be replaced.
- Dash Cam – Connect the dash cam to a computer via the USB cable to see if it powers up.
- The battery will only charge while the vehicle is switched on.
- If the vehicle is not frequently used the dash cam battery will fully discharge and may need to be connected to a domestic USB charger (such as a smartphone charger) for approximately 4 hours to fully charge.
- The time and date settings will reset when the dash cams battery is flat. Make sure the dash cams battery is fully charged in order to retain the time and date settings.
- While the dash cam is recording the Menu can not be accessed. Stop recording before pressing the Menu button.
- Dash cams have an automatic screen saver feature. This helps reduce heat in the dash cam and also makes the dash cam less distracting to the driver.
- If you prefer the screen remain on, this can be changed in the dash cam settings under “Screen Saver”.
- It is normal for the dash cam to feel warm to the touch during typical use, especially when it is recording HD video.
- Format the Micro SD card before using. Be sure the Micro SD card is compatible with the device, see “Stops automatically while recording” fault.
- Check to see whether there is enough space on the Micro SD card. If not, the Micro SD card will need to be formatted.
- Check to see if there are any finger prints or dirt present on the camera lens. If needed, clean with a soft dry cloth before recording.
- Also be sure to have removed the transparent lens cover during installation.
- Reset the unit by pushing and holding the reset button for a few seconds and try again.
- Format Micro SD Card in a computer.
- This is normal. Batteries in dash cams only hold enough power to safely shut down the dash cam, securely save the last file when power is disconnected and retain settings.
- The dash cam is designed to be connected to power at all times while being used.
- Check to see whether there is enough space on the Micro SD card.
- Ensure correct Micro SD card is being used, 8-32Gb Class 10 or above Micro SDHC is recommended. Other types of Micro SD cards may not be suitable for use in dash cams.
- If the correct Micro SD Card is being used, format the Micro SD Card in a computer.
- Micro SD cards have a limited lifespan and become corrupt after a period of time. This is due to the continuous loop recording function. If this has occured, you will need to replace you Micro SD Card.
- The video files from the dash cam are in .AVI format and may not be compatible with your PC if suitable playback software is not installed.
- Reset the unit by pushing and holding the reset button for a few seconds and try again.
- Format Micro SD Card in a computer.
- Should the problem persist please contact us:
EMAIL – [email protected]
DOWNLOADS
Manual Download:
FAQ
- You can setup the Auto dimming feature which allows you to set a time for when the screen will automatically dim to the desired level. NOTE: This feature will only work when Apple CarPlay is connected.
- You can also adjust the brightness on the fly using the ‘assistive touch icon’ and tapping the brightness icon.
- Up to 256GB Micro SD is supported.
- They will only show when the vehicle is in reverse and the camera has been connected to a reverse trigger in the vehicle.
- You can exit Android Auto by bringing up the application list and tapping exit.
- To exit CarPlay, bring up the application menu and then tap the ‘SmartScreen’ icon.
- Factory reset is available in the menu which allows you to reset the monitor back to factory settings.
- Vehicle Accessory Socket – Check the vehicle accessory socket has power, simply plug another device and see if it powers up (or use a test light / multimeter to check for power).
- Monitor Power Cable – Check the fuse in the tip of the accessory plug, it may need to be replaced.
- Using a Type-C to Type-C cable will not work on this unit.
- Ensure dashboard is clean and free of debris, use an alcohol swab to clean.
- Ensure that the protective film has been removed from the adhesive pad.
- When mounting hold the bracket firmly to the dashboard for at least 60 seconds.
DOWNLOADS
Manual Download:
PC/MAC GPS Player Download:
Download the app here:
FAQ
- Ensure windscreen is clean and free of debris, use glass cleaner or an alcohol swab to clean.
- Ensure that the plastic film has been removed from the adhesive pad.
- When mounting hold the bracket firmly to the windscreen for at least 60 seconds.
- Vehicle Accessory Socket – Check the vehicle accessory socket has power, simply plug another device and see if it powers up (or use a test light / multimeter to check for power).
- Dash Cam Power Cable – Check the fuse in the tip of the accessory plug, it may need to be replaced.
- Dash Cam – Connect the dash cam to a computer via the USB cable to see if it powers up.
- The battery will only charge while the vehicle is switched on.
- If the vehicle is not frequently used the dash cam battery will fully discharge and may need to be connected to a domestic USB charger (such as a smartphone charger) for approximately 4 hours to fully charge.
- This is normal. Batteries in dash cams only hold enough power to safely shut down the dash cam, securely save the last file when power is disconnected, to retain settings, to allow for parking mode and to take a couple of photos.
- The dash cam is designed to be connected to power at all times while being used.
- The time and date settings will reset when the dash cams battery is flat. Make sure the dash cams battery is fully charged in order to retain the time and date settings.
- Make sure you have downloaded the XVIEW XV4K Dash Cam App to your smartphone.
- Ensure WiFi is switched on in your mobile settings and select your dash cam from the device list.
- Make sure you have entered the correct password for the device (12345678).
- If the device is still not connecting correctly, forget the dash cam from the phone through the settings, reset the dash cam, reset the mobile phone, and then try again.
- Check your phone has the latest software update and also check the app has been updated with the latest version.
- While the dash cam is recording the Menu can not be accessed. Stop recording before pressing the Menu button.
- Dash cams have an automatic screen saver feature. This helps reduce heat in the dash cam and also makes the dash cam less distracting to the driver.
- If you prefer the screen remain on, this can be changed in the dash cam settings under “Screen Saver”.
- It is normal for the dash cam to feel warm to the touch during typical use, especially when it is recording HD video.
- Check to see whether there is enough space on the Micro SD card.
- Ensure correct Micro SD card is being used, 8-128Gb Class 10 or above Micro SDHC is recommended. Other types of Micro SD cards may not be suitable for use in dash cams.
- If the correct Micro SD Card is being used, format the Micro SD Card in a computer.
- Micro SD cards have a limited lifespan and become corrupt after a period of time. This is due to the continuous loop recording function. If this has occured, you will need to replace you Micro SD Card.
- Format the Micro SD card before using. Be sure the Micro SD card is compatible with the device, see “Stops automatically while recording” fault.
- Check to see whether there is enough space on the Micro SD card. If not, the Micro SD card will need to be formatted.
- The video files from the dash cam are in .MP4 format and may not be compatible with your PC if suitable playback software is not installed.
- Check to see if there are any finger prints or dirt present on the camera lens. If needed, clean with a soft dry cloth before recording.
- Also be sure to have removed the transparent lens cover during installation.
- Reset the unit by pushing and holding the reset button for a few seconds and try again.
- Format Micro SD Card in a computer.
- Reset the unit by pushing and holding the reset button for a few seconds and try again.
- Format Micro SD Card in a computer.
- Should the problem persist please contact us:
EMAIL – [email protected]
If a 64GB card is not working in the dash cam, try the following steps:
- Unplug the dash cam from power
- Remove 64GB SD card whilst power is OFF
- Turn dash cam back ON without any SD card inserted
- Connect to dash cam Wi-Fi & connect with Gator app on your phone
- Insert SD card whilst dash cam is still ON and you are still connected with the app
- Format the SD card using the format options in the Gator App
- Power the dash cam OFF
- Turn dash cam back ON, it should now work correctly with the 64GB SD card installed.
For screen or non wifi models follow the same process but use the dash cam settings menu to access the format options.
DOWNLOADS
Manual Download:
FAQ
- It is normal for the Mirror Display to feel warm to the touch during typical use.
- Check to see if there are any finger prints or dirt on the camera lens. If needed, clean with a soft dry cloth before recording.
- Also be sure to have removed the transparent lens screen/cover during installation.
- Reset the unit by accessing reset function in the menu.
- Reset the unit by accessing reset function in the menu.
- Should the problem persist please contact us:
EMAIL – [email protected]
RANGE COMPARISON
| SPECIFICATION | 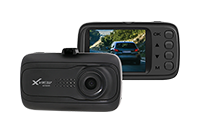 XV10DVR |
 XV20DVR |
 XV22DVR |
 XV2KDVR |
|---|---|---|---|---|
| Resolution | 1080P HD | 1080P FHD | 1080P FHD | 2K QHD |
| Number of Channels | 1 | 1 | 2 | 1 |
| Camera Angle | 140° | 152° | 152°(F) / 120°(R) | 152° |
| Display | 2″ | – | – | – |
| Inbuilt Wifi | – | ✔ | ✔ | ✔ |
| GPS Tracking | – | ✔ | ✔ | ✔ |
| Parking Mode | – | ✔* | ✔* | ✔* |
| G-Sensor | ✔ | ✔ | ✔ | ✔ |
| Super Capacitor | – | ✔ | ✔ | ✔ |
| Hand Gesture Photo | – | ✔ | ✔ | ✔ |
| Photo Mode | ✔ | – | – | – |
| Built in Microphone & Speaker | ✔ | ✔ | ✔ | ✔ |
| Micro SD Capacity | 32GB | 64GB | 64GB | 256GB |
| Micro SD Included | 8GB | 8GB | 16GB | 32GB |
*Needs Hard Wire Kit for Parking Mode to operate (XVHWC)